



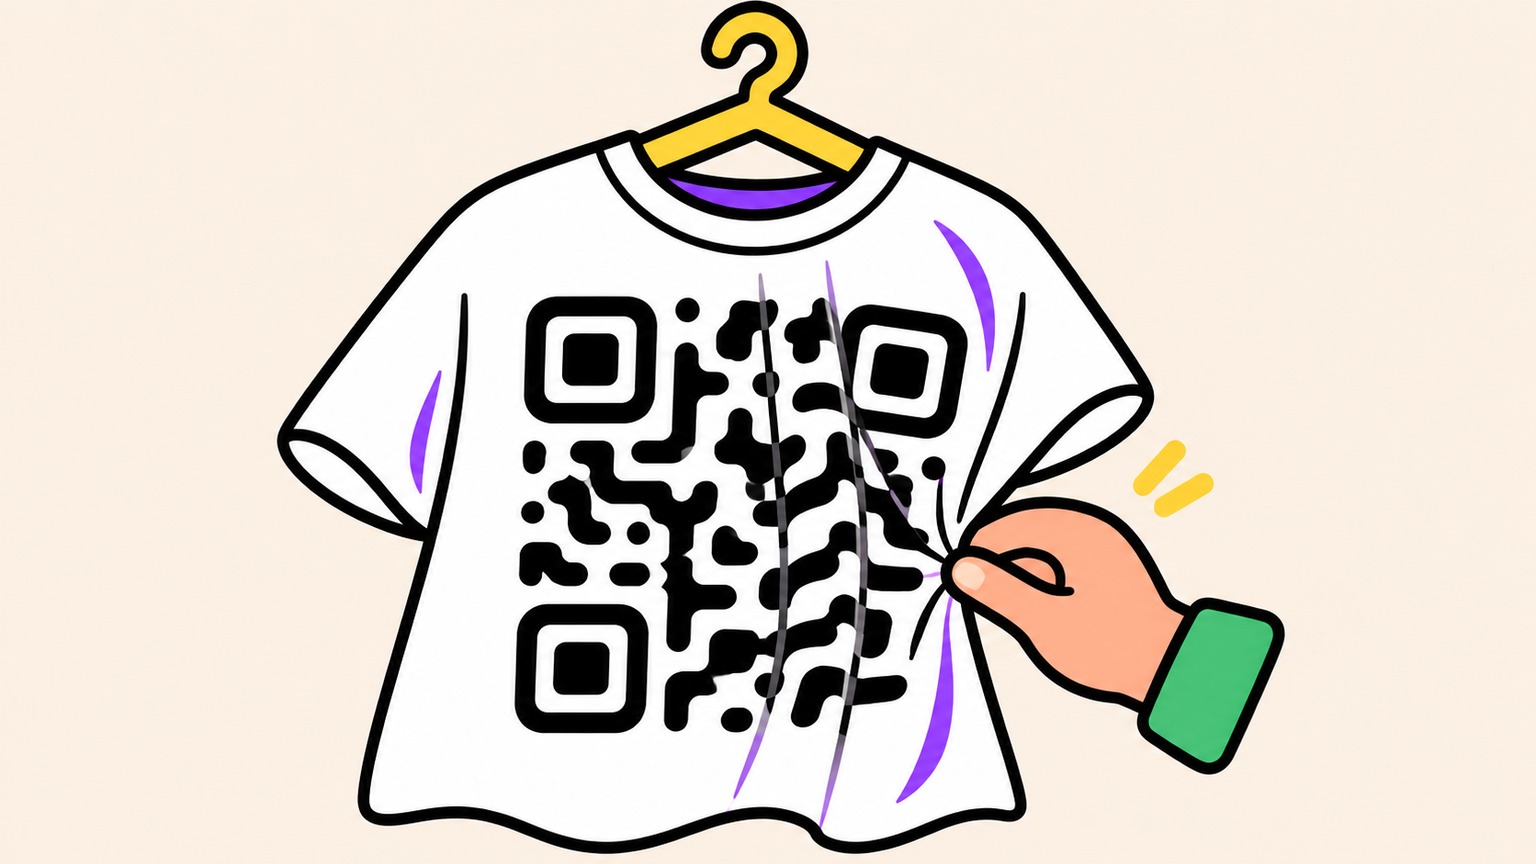
Yes, a QR code on a T-shirt can still scan when the fabric folds. We tested the fold in a computer simulation. When the fold hid half the width of one little square in the code, Apple's Vision software on a Mac read the correct URL in all 192 images we tried at that width. When a whole square’s width was hidden, moving the fold was sometimes enough for the reader to pick up the link again.
If you're ordering shirts for a trade show, ask the print shop for a sample before you sign off. Have a coworker wear it and try scanning it yourself from where an attendee will actually stand.
One QR code, with the fold in two different places
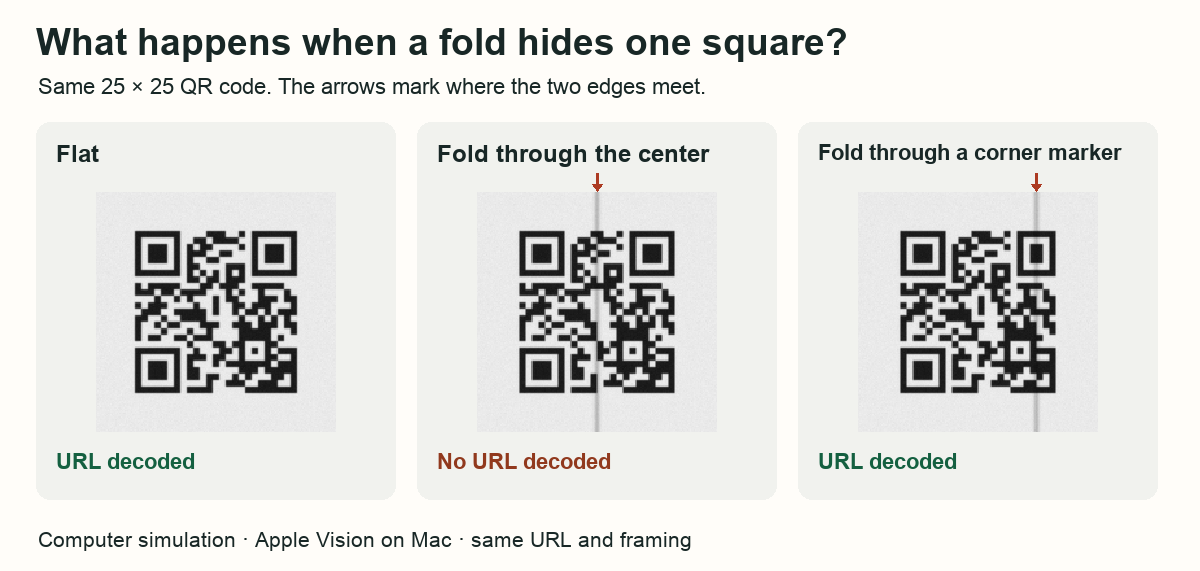
The arrows mark where the two sides of the simulated fold meet. Each result is what Apple Vision read from the original image, before we enlarged it for this illustration.
Look at the gray line in the middle picture. Imagine pinching the fabric from the inside of the shirt. A narrow strip of the printed design tucks into the fold, and the parts on either side come together. To model that on a computer, we removed a strip from the image, brought the edges together and added a thin shadow along the join.
Our code is 25 little squares across. Suppose you printed the design 5 cm wide (about 2 inches), excluding the blank border. Each square would measure 2 mm across. A fold that hid a 2 mm strip from top to bottom would take an entire column out of view. Here we're measuring how much of the design disappears into the fold. A different QR code printed at the same size could pack more squares into that space.
In the right-hand picture, we kept the same pattern, framing and fold width, then moved the fold so it crossed the big square in the upper right. You can see the distortion in that corner, yet the reader recovered the link. In the middle picture, all three big corner squares are intact and the reader came up empty.
Why the center fold gave the reader more trouble
Those three large squares help a scanner locate the code and work out which way it's facing. It still has to read the smaller squares inside. Follow the top row in the close-up below. In the flat image, a black square separates two white ones. When column 13 folds out of sight, the white squares in columns 12 and 14 meet. The reader now sees one white stretch where the pattern used to go white, black, white.
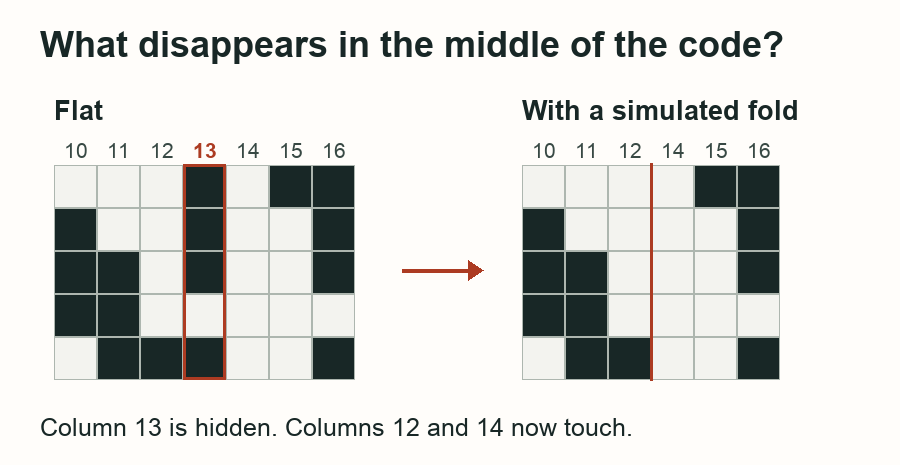
That shift could account for some of the failed reads in the center. We counted a success only when Vision returned the exact URL. When it failed, the software didn't tell us which step had gone wrong.
We kept the same URL and the same 25 squares across, but encoded it in eight different black-and-white patterns. Three image resolutions and two rotations of the image gave us 48 flat images. For each one, we ran a vertical fold through the center, then through the upper-right corner marker. We also tried horizontal folds through the center and the lower-left marker. That gave us 96 images per position at each fold width.
- With half a square's width hidden, the reader got all 96 center folds and all 96 corner folds.
- At one square, it got 20 of 96 through the center and 77 of 96 through a corner marker.
- At one and a half squares, it got 0 of 96 through the center and 9 of 96 through a corner marker.
- At two squares, it got 0 of 96 in either position.
The full test included 1,584 images. Of those, 1,536 showed a simulated fold at one of eight widths. The other 48 were flat controls, and every one scanned. At one square wide, the center fold failed and the corner fold scanned in 57 of the 96 matched pairs. All we'd changed within each pair was where the fold fell.
We modeled a closed fold running straight across the design. A shirt can also ripple while every square stays visible, or crease diagonally when someone lifts an arm. The knit, the ink and the camera in an attendee's phone all come into play when you try the printed shirt.
Where should the code go, and how big should you print it?
Think about the moment you want someone to take out a phone. A chest print is in view while a visitor talks to someone at your booth. If the code is on the back of a staff shirt, the person scanning may be a few steps down the aisle. Have two teammates stand in those spots before your designer sets the size. Our QR code print size guide gives you a starting point for that distance.
Print a paper copy at the proposed size and hold it against the shirt while someone's wearing it. You'll quickly spot a badge lanyard that covers the code or a booth counter that hides half the design. Then take the paper away and ask the wearer to hand you a program or turn toward a visitor. Watch where the fabric bunches. If the same crease keeps crossing the spot you picked, you can still move the artwork.
Tell your designer whether your measurement includes the blank border, called the quiet zone. DENSO WAVE, the company that developed the QR code, specifies a clear border four squares wide on every side. Take our 5 cm design again. At 2 mm per square, it needs 8 mm of clear space on each side, for a total width of 6.6 cm (about 2.6 inches). If you've only got 2 inches on a pocket, give the shop that measurement before sizing the artwork.
Ask what detail the shop can hold on your fabric, too. Transfer Express scanned a half-inch code on one of its digital transfers. With its Goof Proof screen-printed transfer, the smallest code the shop could read was 1.5 inches wide. Those measurements came from its own samples. For a small pocket print, ask to see a sample made with the transfer you plan to order. Check that the narrow white gaps in the artwork are still open on the shirt.
Before you order 100 shirts, have someone wear one
Get a sample in the cut and fabric you're ordering, with the code at the intended size. Give the shirt to a teammate and keep the phone.
- Start with the shirt laid flat. Point the camera at the code. If it struggles even up close, compare the print with the artwork you sent the shop. Check the edges of the squares and the clear border. If two squares that were separate in the file have run together in print, show the printer exactly where. How to prepare a QR code for print
- Scan it on the wearer. Have your teammate put the shirt on and let it hang naturally. For a chest print, scan it face-to-face. For a back print, try it from the aisle as your teammate turns toward the booth. If the pattern is flat and visible but you have to walk right up to it, try a larger code. If smoothing out a fold brings up the link, try a spot where the fabric stays flatter.
- Open the link. Make sure it lands on the page you want attendees to see. Keep the sample that worked at the distance you need. If you change the design or its position, repeat the check on the revised sample before approving the run.
Send the printer an SVG and the dimensions you approved. The vector artwork keeps its edges sharp when the shop sizes it. If you update the event program at the same web address each year, a static QR code will do. If each show gets a new URL and you want to reuse the shirts, a dynamic code lets you change the destination after printing. You can make your QR code with Oh My Code and download a static SVG for free. An editable destination requires a subscription.